How to Import PDF Bank Statements into QuickBooks
QuickBooks Online and Desktop don't accept PDF files directly. You have to convert the PDF to a QBO (Web Connect) file or CSV first, then upload that. This guide walks through four methods to do it, the exact QuickBooks import steps for each, and what goes wrong specifically with PDF bank statements.
To import a PDF bank statement into QuickBooks, you have to convert it first. The four methods are: connect your bank directly via QuickBooks bank feeds (only works for supported banks and only goes back 90 days), download a QBO/QFX file directly from your bank if available, manually convert to CSV and upload (free but error-prone), or use a dedicated PDF-to-QBO conversion tool. For historical statements, scanned PDFs, or bulk imports, dedicated tools like SendItSheets convert the PDF to a QuickBooks-compatible QBO file with balance validation built in.
Why importing PDF bank statements into QuickBooks is harder than it should be
QuickBooks Online and QuickBooks Desktop both support importing bank transaction data, but neither accepts PDF files directly. The official supported formats are QBO (also called Web Connect), QFX, OFX, and CSV. PDFs have to be converted first.
This is a problem because most banks deliver statements as PDFs, especially historical statements older than 90 days. You can connect QuickBooks directly to your bank for ongoing transactions, but bank feeds typically only pull the last 90 days, frequently disconnect, and don't work with all banks (smaller credit unions and regional banks are often unsupported).
The most common scenario where this matters: An accountant receives a client with messy books, 6-12 months of historical bank statement PDFs, and a need to import everything into QuickBooks at once. Bank feeds won't help (they only pull 90 days). Manual entry would take weeks. The solution requires PDF conversion.
Below are four methods to handle this. Each method has its own constraints around which banks it works with, how much manual work is involved, and how reliable the import is.
Direct bank feed connection
QuickBooks connects directly to most major US banks and pulls transactions automatically. This is the easiest method when it works, but it has significant limitations for any historical or non-standard banking situation.
- QuickBooks Online or Desktop subscription
- A bank that QuickBooks supports (most major US banks; many regional banks and credit unions are not supported)
- Your online banking login credentials
- An accepting attitude toward the 90-day historical limit
Step-by-step: Connect QuickBooks Online to your bank
- In QuickBooks Online, go to Banking → Bank transactions.
- Click Link account in the upper right.
- Search for your bank by name. If your bank isn't listed, this method doesn't work; skip to Method 2 or 4.
- Sign in with your online banking credentials. You may need to complete multi-factor authentication.
- Select which accounts to import (checking, savings, credit card, etc.).
- Choose the QuickBooks account each bank account should map to in your chart of accounts.
- QuickBooks pulls the last 90 days of transactions automatically. New transactions sync daily after that.
What goes wrong with bank feeds
The 90-day historical limit. Bank feeds only pull recent transactions. Closed accounts, statements older than 3 months, or accounts you're just adding to QuickBooks for catch-up work all require a different method.
Frequent disconnections. Bank feeds break regularly due to bank security updates, password changes, multi-factor authentication updates, or browser changes on the bank side. When a feed breaks, you stop getting transactions until you re-authenticate. Some users report needing to reconnect monthly.
Unsupported banks. Many smaller credit unions, regional banks, and international institutions don't have QuickBooks bank feed integration. If your bank isn't in the supported list, this method is unavailable.
Categorization is still manual. Bank feeds bring transactions in, but each one still needs to be matched to an existing QuickBooks transaction or categorized to a chart of accounts category. The "automation" only handles ingestion, not classification.
When to use bank feeds
- Your bank is a major institution that QuickBooks supports
- You're processing ongoing current transactions, not historical data
- You're willing to deal with periodic re-authentication
- You have less than 90 days of transactions to import
When to skip bank feeds and try another method
- Your bank isn't supported by QuickBooks
- You need to import historical statements (older than 90 days)
- You're processing client statements where you don't have direct bank login access
- The bank feed for this account is currently broken or disconnected
Manual CSV upload
If you can get your bank statement data into a properly-formatted CSV file, QuickBooks can import it. The challenge is the formatting requirements are strict, and converting a PDF statement to a clean CSV is significant manual work.
- QuickBooks Online or Desktop
- Bank statement data in a CSV file with date, description, and amount columns
- Patience for QuickBooks's strict format requirements
Step-by-step: Manual CSV upload to QuickBooks Online
- Convert your PDF bank statement to a CSV file. This is the hard part. Options include manual transcription, copy-paste from PDF, Excel Power Query (Get Data from PDF), Adobe Acrobat Pro Export, or a free online converter.
- Open the CSV in Excel and verify the data. The file needs at minimum: a date column (MM/DD/YYYY format), a description column, and an amount column.
- Clean the data: remove header rows, balance summary rows, page break markers, and any text that isn't a transaction.
- Standardize the date format. Mixed date formats (some MM/DD/YYYY, some DD/MM/YYYY) cause silent import failures. Use Excel's
TEXT(A2,"MM/DD/YYYY")to force consistency. - Standardize the amount column. Remove currency symbols, commas, and special characters. Convert
$1,250.00to1250.00. Use negative numbers for debits or use separate Debit/Credit columns. - Save as CSV (UTF-8 if special characters are present).
- In QuickBooks Online: Banking → Bank transactions, click the dropdown next to Link account, choose Upload from file.
- Select your CSV file. Choose the QuickBooks account it should import to.
- QuickBooks shows a column mapping interface. Match your CSV columns to Date, Description, Amount (or Debit/Credit).
- Review the preview. Click Yes to import.
- QuickBooks imports the transactions. Each one then needs to be matched or categorized in the Banking review queue.
What goes wrong with CSV uploads

Date format errors are the #1 reason CSV imports fail. QuickBooks expects MM/DD/YYYY for US accounts. If your file has DD/MM/YYYY, dates parse incorrectly. If formats are mixed (some rows MM/DD, others DD/MM), some transactions get imported with wrong dates while others fail entirely.
Currency symbols and commas break amount parsing. A cell containing $1,250.00 imports as text, not a number. QuickBooks either rejects the row or imports zero as the amount.
Single amount column vs Debit/Credit columns. Some banks export CSVs with one amount column (positive credits, negative debits). Others export separate Debit and Credit columns. QuickBooks accepts both but the column mapping has to match exactly. Mismatched mappings cause every credit to import as a debit and vice versa.
Header rows imported as transactions. If you forget to remove the bank's header rows ("Statement Period:", "Account Number:", "Beginning Balance:") from the CSV, QuickBooks tries to import them as transactions and fails on the first non-numeric amount.
Duplicate detection is unreliable. CSV imports rely on date + amount + description matching to detect duplicates. If you've already imported some transactions via bank feed and then upload an overlapping CSV, you'll often get duplicates that have to be deleted manually.
When to use manual CSV upload
- Your bank exports CSV files directly from online banking (no PDF conversion needed)
- You're comfortable with Excel formatting work
- Volume is low (under 5 statements per month)
- The data fits QuickBooks's strict format requirements with minimal cleanup
When to skip CSV upload
- Your bank only provides PDF statements (the conversion step is significant work)
- You're processing many statements (the per-file cleanup time accumulates)
- Your statements have multi-account layouts (CSV doesn't handle this well)
- You need balance validation before importing (CSV format has no validation)
Download a QBO/QFX file from your bank
Some banks let you download bank transaction data directly as a QBO file (the Web Connect format) or a QFX file. These are the formats QuickBooks prefers because they import without column mapping. The transactions arrive pre-classified with account types and transaction codes already set.
- QuickBooks Online or Desktop
- A bank that offers QBO or QFX downloads from online banking (not all do)
- Access to your bank's online portal
Step-by-step: Download QBO file from bank, import to QuickBooks
- Log in to your bank's online portal.
- Navigate to your account, find the export or download option (usually labeled "Download transactions" or "Export").
- Choose the file format. Look for QBO (Web Connect), QuickBooks, or QFX (Quicken Web Connect). If only PDF or CSV are offered, this method is unavailable; skip to Method 4.
- Select the date range for the transactions you want.
- Download the file to your computer.
- In QuickBooks Online: Banking → Upload transactions, browse for the file, and follow the prompts.
- In QuickBooks Desktop: File → Utilities → Import → Web Connect Files, select your QBO file.
- Choose the QuickBooks account to import to (or create a new one).
- Review the transactions in the Banking review queue and match or categorize each one.
What goes wrong with QBO downloads from banks
Most banks don't offer QBO downloads. Major banks like Chase, Bank of America, and Wells Fargo offer them. Many regional banks, credit unions, and community banks don't. If your bank only offers PDF or CSV downloads, this method isn't available.
Date range limits are common. Banks that do offer QBO downloads often limit the date range to 90 days, 180 days, or 1 year. Older transactions still require PDF conversion.
QBO files from banks include all transactions, including ones already in QuickBooks. Importing a QBO that overlaps with existing data creates duplicates. QuickBooks's transaction ID matching catches some, but not all, especially if account numbers changed or accounts moved.
"Web Connect" vs "Direct Connect" confusion. Some banks offer Direct Connect (a paid feature that connects QuickBooks directly to the bank in real-time) but not Web Connect file downloads. The two are different features.
When to use QBO download from bank
- Your bank explicitly offers QBO or QFX file downloads
- The transactions you need are within the bank's date range limit
- You don't already have overlapping data in QuickBooks for the same period
- You want the cleanest possible import format with no manual mapping
When to skip and use Method 4 instead
- Your bank doesn't offer QBO/QFX downloads (only PDF or CSV)
- You need historical data older than the bank's download limit
- You're an accountant working with client statements you can't access directly from the bank
Dedicated PDF-to-QBO conversion tool
Purpose-built tools that take a PDF bank statement, extract the transactions, validate the math, and export a QuickBooks-compatible QBO file. This category includes self-serve tools (SendItSheets, DocuClipper, Lido) and enterprise platforms (Heron Data, Klippa).
- An account with one of the conversion services (most have free trials or free tiers)
- The PDF can be digital-native or scanned (most tools have OCR built in)
- QuickBooks Online or Desktop for the final import
How dedicated tools differ from generic methods
Native QBO export. Dedicated tools generate the QBO file format directly. No manual column mapping, no CSV cleanup, no date format wrangling. The output imports into QuickBooks in seconds.
Built-in balance validation. Most dedicated tools verify that beginning balance + transactions = ending balance before exporting. Errors are caught before they reach QuickBooks, where they would silently corrupt reconciliation.
Batch processing. Upload 6-24 months of statements at once. Each one is converted independently and the results are organized for bulk import. This is the killer feature for catch-up engagements.
OCR for scanned statements. Older statements or paper statements scanned to PDF need OCR before any data can be extracted. Dedicated tools include OCR; generic methods (Power Query, copy-paste) don't.
Step-by-step: Convert PDF to QBO with SendItSheets, then import to QuickBooks
SendItSheets is one option in the self-serve category. Free 14-day trial includes 30 pages, no credit card required. Paid plans start at $20/month for 250 pages. The walkthrough below shows the full workflow.
- Sign up at senditsheets.com/signup with email (no credit card required).
- Click Upload Bank Statements and drop your PDF (or batch of multiple statements).
- Wait 10-30 seconds while extraction runs. Each statement is processed independently with balance validation.
- The review view shows each statement with: account info, statement period, beginning balance, ending balance, full transaction list, and a balance verification badge.
- If any statement fails balance verification, the affected rows are highlighted. Click any cell to edit and re-validate.
- Click Export and choose QBO format.
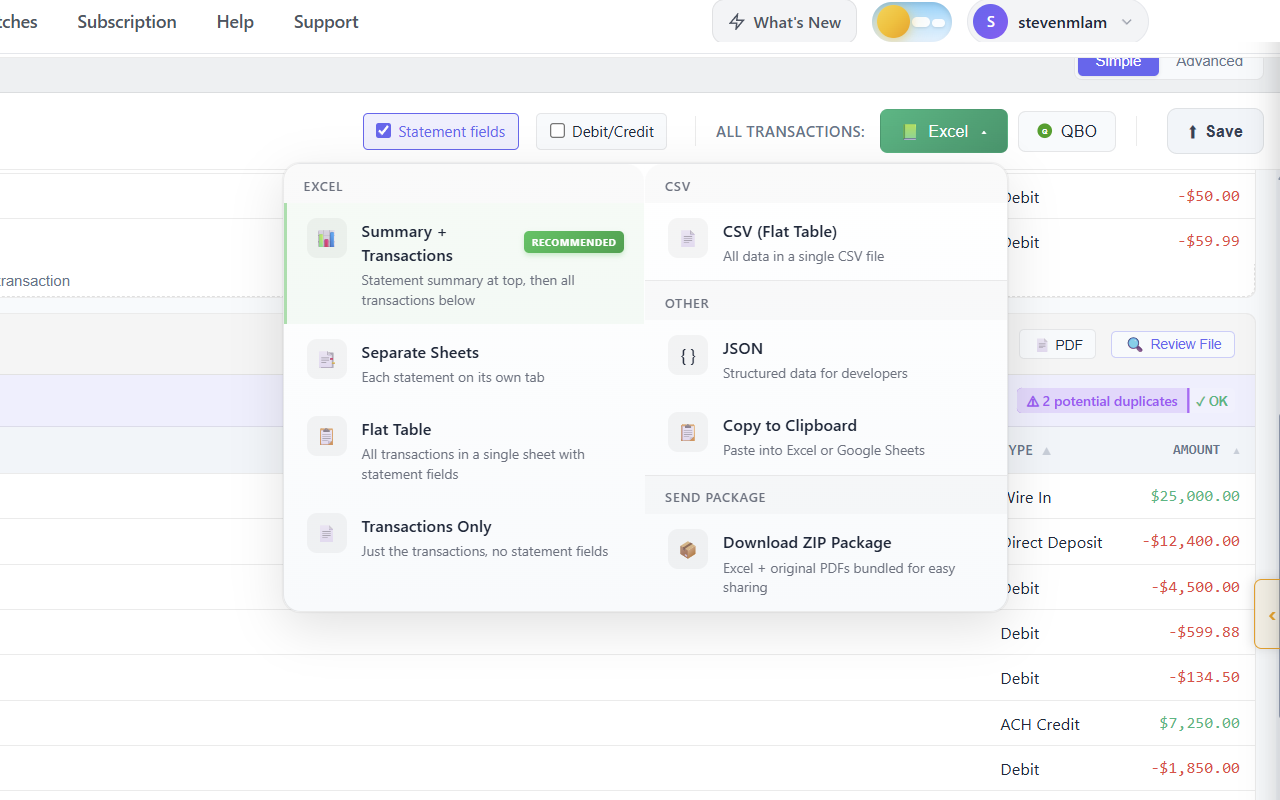
- Download the QBO file to your computer.
- In QuickBooks Online: Banking → Bank transactions → Upload transactions. Browse for the QBO file. Choose the destination account. Click Upload.
- In QuickBooks Desktop: File → Utilities → Import → Web Connect Files. Select the QBO file. Choose an existing account or create a new one.

- QuickBooks imports the transactions and routes them to the Banking review queue.
- Match each transaction to existing QuickBooks records or categorize to your chart of accounts.
Realistic time estimate for a 12-statement catch-up project: 15-25 minutes total in SendItSheets (batch upload, batch validation, batch QBO export), then 5-10 minutes per statement in QuickBooks for the review queue (matching and categorizing). Compare to 2-4 hours per statement for manual CSV cleanup, or weeks of waiting for the bank to provide historical QBO files.
Other dedicated tools in the same category
SendItSheets isn't the only option. Other self-serve tools targeting bookkeepers and small accounting firms include DocuClipper (more mature feature set, $39+/month), Lido (similar workflow, slightly different pricing), and Dext (broader accounting suite with statement extraction included). All of them generate QBO files and follow a similar overall workflow.
Enterprise platforms like Heron Data and Klippa target lending firms and large finance teams with sales-led onboarding. They're oversized for individual bookkeepers and small accounting firms.
When to use a dedicated PDF-to-QBO tool
- You need to import historical statements (older than 90 days)
- Your bank doesn't offer QBO downloads
- You're processing client statements in bulk (catch-up, year-end, audit prep)
- Your statements are scanned PDFs (Power Query and copy-paste don't work)
- You need balance validation as part of the workflow
- You handle multi-account statements
When dedicated tools are overkill
- Your bank already offers Web Connect downloads and you only need recent data
- You're processing 1-2 statements per year
- The cost of a subscription doesn't justify the time savings
Which method should I use?
The right method depends on your bank, your QuickBooks edition, and what kind of data you're importing. Use this decision matrix as a starting point.
| Your situation | Recommended method | Why |
|---|---|---|
| Ongoing transactions, major US bank, QuickBooks supports it | Method 1: Bank feeds | Easiest setup, syncs automatically, no per-import work after initial connection |
| Recent transactions, bank offers QBO download | Method 3: QBO from bank | Cleanest format, no column mapping, transactions arrive pre-classified |
| Bank only offers CSV download, low volume | Method 2: Manual CSV | Free, works with any bank, acceptable for occasional imports |
| Historical statements (older than 90 days) | Method 4: PDF-to-QBO tool | Bank feeds and QBO downloads typically don't go back this far; PDF conversion is required |
| Catch-up bookkeeping (6-24 months of client statements) | Method 4: PDF-to-QBO tool | Batch processing handles the volume; balance validation prevents reconciliation errors |
| Bank not supported by QuickBooks (smaller credit union, regional bank) | Method 4: PDF-to-QBO tool (or Method 2) | Bank feeds unavailable; manual CSV is free but slow; dedicated tools are faster for volume |
| Scanned bank statements (paper statements scanned to PDF) | Method 4: PDF-to-QBO tool | Generic methods can't read scanned PDFs; dedicated tools have OCR built in |
| Multi-account statements (checking + savings + credit card on one PDF) | Method 4: PDF-to-QBO tool | Generic methods merge accounts; dedicated tools split each account independently |
Most accountants and bookkeepers handling client work end up in the "Method 4" rows. Bank feeds work for ongoing transactions on personal QuickBooks accounts; for client work, historical data, or non-supported banks, dedicated PDF-to-QBO tools are the practical choice.
Frequently asked questions
$1,250.00 needs to be 1250.00), header rows still present (statement period, account number, beginning balance rows that aren't actual transactions), and inconsistent debit/credit columns. Method 2 above includes the full cleanup checklist.Related guides
- Bank statement to Excel converter - the comprehensive bank statement extraction tool with validation and batch processing
- Multi-account bank statement extraction - methods for splitting checking, savings, and credit card sections from a single PDF
- Bookkeeping cleanup for bank statements - workflow for processing many historical statements during catch-up engagements
Convert PDF bank statements to QBO format
SendItSheets generates QuickBooks-compatible QBO files from any PDF bank statement, with balance validation built in. Free 14-day trial with 30 pages, paid plans from $20/mo. No demo required.
See the SendItSheets bank statement tool →